There’s a point in every braise where you stop cooking dinner and start cooking a mood. This is that recipe. It takes most of an afternoon, it uses almost every burner and rack I own, and by the time it’s done my whole house smells like a steakhouse that got into an argument with a wine cellar. I wouldn’t have it any other way.
I started making short ribs the usual way, braised low and slow in the oven, and they were good. Then I got stubborn about it and decided the pellet grill should get a turn before the Dutch oven does. A short smoke before the braise adds a layer of flavor you can’t get from an oven no matter how patient you are, and it turns out beef short ribs and red wine were basically made to sit next to a little oak smoke. This version is richer, smokier, and more fall-apart tender than anything I made before I started doing it this way.
Give yourself the afternoon. It’s mostly waiting, and it’s worth every minute.
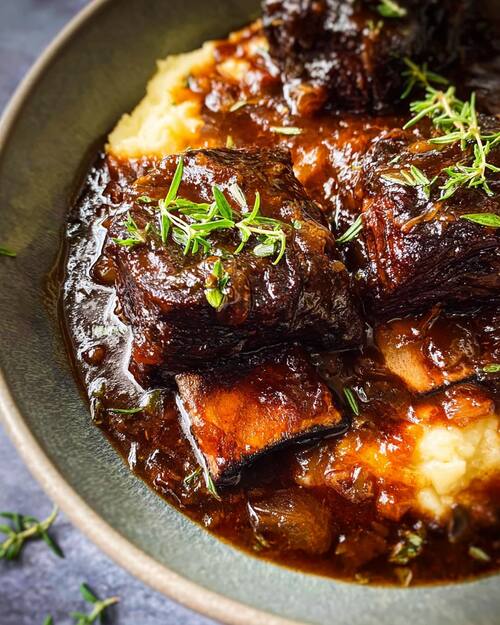
Rich, smoky and fall-apart tender. Serves 4–6.
Ingredients
- 4–5 pounds bone-in English-cut beef short ribs
- 2½ teaspoons kosher salt
- 1 teaspoon coarse black pepper
- 2 tablespoons neutral cooking oil
- 1 large yellow onion, diced
- 2 large carrots, diced
- 2 celery ribs, diced
- 5 garlic cloves, minced
- 2 tablespoons tomato paste
- 2 cups dry red wine, preferably Cabernet Sauvignon
- 2 cups low-sodium beef stock
- 1 tablespoon Worcestershire sauce
- 2 sprigs fresh rosemary
- 5 sprigs fresh thyme
- 2 bay leaves
- 1 tablespoon cold butter
- Chopped fresh parsley for serving, optional
Recommended Pellets
Oak provides the best foundation for the beef and red wine. Oak mixed with pecan adds a slightly richer, sweeter smoke. Hickory also works, but use it lightly so it doesn’t overpower the sauce.
Instructions
1. Season the short ribs
Pat the short ribs completely dry. Season them on every side with the kosher salt and black pepper.
For deeper seasoning, refrigerate the ribs uncovered for 4 hours or overnight. Let them sit at room temperature for about 30 minutes before cooking.
2. Smoke the ribs
Preheat the pellet grill to 250°F.
Place the ribs directly on the grill grates, leaving space between them. Smoke for 45–60 minutes, turning once halfway through. You aren’t trying to cook them through – you’re developing a smoky exterior.
Remove the ribs and increase the pellet grill temperature to 275°F.
3. Brown the ribs
Place the cast-iron Dutch oven over medium-high heat on the stovetop or directly over a suitable side burner.
Add the cooking oil. Working in batches, brown the smoked ribs for approximately 2–3 minutes per side. Transfer them to a plate.
The initial smoking develops flavor; the browning builds the deep, roasted foundation for the sauce.
4. Build the braising liquid
Reduce the heat to medium. Add the onion, carrots and celery to the Dutch oven. Cook for 8–10 minutes, stirring occasionally, until softened and beginning to caramelize.
Add the garlic and cook for 30 seconds.
Stir in the tomato paste and cook for 2–3 minutes, until it darkens to a rusty brick-red color.
Pour in the red wine. Bring it to a strong simmer, scraping up all the browned bits from the bottom of the pot. Simmer for 8–10 minutes, or until the wine has reduced by approximately half.
Add the beef stock and Worcestershire sauce. Stir well.
5. Braise the ribs
Return the short ribs to the Dutch oven, placing them bone-side up. The liquid should reach approximately two-thirds of the way up the meat. Add a little additional beef stock if necessary, but don’t completely submerge the ribs.
Tuck the rosemary, thyme and bay leaves into the liquid.
Place the Dutch oven on the pellet grill uncovered and cook at 275°F for 30 minutes, allowing the sauce and meat to pick up a little more smoke.
Cover the Dutch oven tightly and continue braising at 275°F for 3–3½ hours. Turn the ribs once after about 2 hours.
Begin checking them at the three-hour mark. They’re ready when the meat is around 200–210°F and a thermometer probe or fork slides in with almost no resistance. Tenderness is more important than the exact temperature.
If they still feel firm, cover the pot and continue cooking, checking every 20–30 minutes.
6. Rest the ribs
Carefully transfer the ribs to a platter and loosely cover them with foil. Let them rest for 20–30 minutes.
Remove and discard the rosemary stems, thyme stems and bay leaves. Skim as much fat as possible from the surface of the braising liquid.
7. Finish the sauce
For a rustic sauce, leave the vegetables in the pot.
For a smooth, restaurant-style sauce, pour the liquid through a fine-mesh strainer, pressing gently on the vegetables to extract their juices. Discard the vegetables and return the liquid to the Dutch oven.
Place the Dutch oven over medium heat and simmer the sauce uncovered for 10–20 minutes, until concentrated and thick enough to lightly coat the back of a spoon.
Remove it from the heat and whisk in the cold butter. Taste and adjust with salt and pepper.
Return the ribs to the finished sauce and spoon it generously over the meat.
Serving
Serve the ribs over buttery mashed potatoes, creamy Parmesan polenta or risotto. Spoon plenty of the red-wine sauce over everything and finish with chopped parsley if desired.
Make-Ahead Method
These short ribs are even better the next day.
Allow the ribs to cool in their braising liquid, then refrigerate overnight. The fat will solidify on the surface and can be easily removed.
Reheat the ribs, covered, on the pellet grill or in the oven at 300°F for 35–45 minutes. Remove the ribs, reduce the sauce if necessary and finish it with cold butter.
Cast-Iron Note
An enameled cast-iron Dutch oven is ideal. Red wine and tomato paste are acidic, so a long braise can weaken the seasoning on bare cast iron and occasionally give the sauce a metallic taste. If your Dutch oven is bare cast iron, make sure it is extremely well seasoned and don’t leave the finished sauce sitting in it overnight. Transfer the ribs and sauce to a nonreactive container before refrigerating.
If you make these, I want to hear about it. And if your sauce comes out thin, greasy, or won’t reduce no matter how long you simmer it, that’s a Kitchen Forensics post waiting to happen. Let me know.